

Jan 17 — 2023
SHARE POST

30 Day Social Media Plan
Here is a sample 30-day social media calendar outline for your photo booth company. This includes setting up and executing and is just a guideline to get your creative juices flowing. Add, subtract, alter as needed. The key will be to stick to the plan daily.
Prep your Plan with real images and videos:
If you have not already done so, be sure to take as many pictures and videos as you can at your events. These pictures and videos are going to be the main source of your content. While stock photography and videos are a great way to get started, real pictures and video of your photo booth, and events will be perceived as more genuine than stock images and videos.
Day 1: Review your social media goals and target audience.
It’s important to take a step back and review your overall goals for your social media presence. This might include increasing brand awareness, driving website traffic, or generating leads and sales.
It’s also important to consider your target audience and what types of content and messaging will be most effective in reaching and engaging them. This might involve analyzing data on your current social media followers, as well as researching your target audience to understand their interests, preferences, and behaviors.
Once you have a clear understanding of your goals and target audience, you can start to develop a plan for creating and sharing content that aligns with these objectives. This might include brainstorming ideas for blog posts, social media posts, and other types of content that will be most effective in reaching and engaging your audience.
Day 2: Develop a content calendar for the month, including planned posts and themes.
Developing a content calendar for the month ahead is key. A content calendar is a planning tool that helps you organize and schedule your content in advance, ensuring that you have a consistent stream of engaging and relevant content to share with your followers.
To create your content calendar, start by considering the types of content that you want to share, such as blog posts, social media posts, videos, photos, or articles. You might also want to consider any themes or topics that you want to focus on for the month, as well as any promotions or campaigns that you want to run.
Once you have a list of the types of content you want to create, start planning out when you will publish each piece of content. Consider the best days and times to post based on your audience’s behavior, as well as any other scheduling considerations, such as holidays or events.
As you develop your content calendar, be sure to leave some flexibility for last-minute updates or changes, as well as for responding to any current events or trends that may arise during the month.
Day 3: Set up any necessary social media automation or scheduling tools.
You don’t have to use any tools if you don’t want to but they can definitely save you some time. If you do, set up any necessary tools or automation to help you manage your social media presence more efficiently. There are a variety of scheduling tools available that can help you schedule and publish your social media content in advance, saving you time and effort daily.
There are tons of tools out there, find one that you like and take advantage of automating your posting.
Some examples of scheduling tools include:
Before choosing a scheduling tool, consider your specific needs and budget, as well as any features that are important to you, such as the ability to publish to multiple platforms or track analytics.
Once you have chosen a scheduling tool, take some time to set it up and become familiar with its features. You may want to schedule some of your content for the week or month ahead to get a head start on your social media management.
Day 4: Plan out any promotions or campaigns for the month.
Promotions and campaigns can be a great way to engage your followers, drive website traffic, and generate leads and sales. While not always necessary, promotions can help gain additional traction on social media and help fill in the calendar where you have holes.
Some examples of promotions and campaigns that you might consider include:
When planning a promotion or campaign, be sure to consider your goals, target audience, and budget, as well as any legal or regulatory requirements that may apply. You should also develop a plan for promoting and managing the promotion or campaign, including details such as the duration, eligibility, and terms and conditions.
Day 5: Post a behind-the-scenes photo or video of your photo booth setup
Some ideas include:
Day 6: Share a customer testimonial or review.
Customer testimonials are a great way to show potential clients how pleased your past clients were. Video testimonials are even more powerful than written reviews as it attaches a real face and voice to the testimonial.
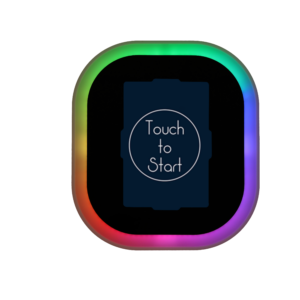
Day 7: Post a photo or video of your photo booth in action at an event.
This type of content can be a great way to showcase your photo booth and give your followers a sense of what it is like to use your service.
To create this type of content, you might follow these steps:
By sharing photos and videos of your photo booth in action, you can give your followers a better sense of what it is like to use your service and encourage them to book a photo booth for their own events.
Day 8: Share a fun fact about photo booths or the history of the industry.
This type of content can be a lighthearted and engaging way to provide value to your followers and show off your knowledge about your business.
To create this type of content, you might follow these steps:
By sharing fun facts about photo booths or the history of the industry, you can engage your followers and show off your knowledge about your business, while also providing value and entertainment.
Day 9: Share a blog post or article about event planning or using a photo booth.
By creating and publishing high-quality blog posts or articles about event planning or using a photo booth, you can provide valuable information to your followers, position yourself as a thought leader in your industry, and drive website traffic and lead generation.
To create this type of content, you might follow these steps:
Day 10: Take a break and review and analyze the results of your social media efforts from the previous week.
Day 11: Share a photo of a custom photo booth backdrop or prop.
Day 12: Share a quote or meme related to events or photo booths.
Day 13: Share a tutorial or tips for using your photo booth.
Some ideas could be how you:
Day 14: Take another break and review and optimize any ongoing social media campaigns.
Day 15: Share a photo or video of a recent event where you provided a photo booth.
Day 16: Share a success story or case study featuring your photo booth.
Day 17: Share a sneak peek of a new product or service you are launching.
Some ideas of new products you could share are:
Day 18: Break time! Review and analyze the results of your social media efforts from the previous week.
Day 19: Share a photo or video of your team setting up or working at an event.
Day 20: Share a customer photo or video taken in your photo booth.
Day 21: Share a post about the benefits of using a photo booth at events.
Day 22: Share a post about your involvement in the community or any charitable work you do.
Day 23: Review and optimize any ongoing social media campaigns.
Day 24: Share a throwback photo or story about your photo booth business.
Day 25: Share a post about the different types of events your photo booth can be used at.
Day 26: Share a post about the various customization options available for your photo booth.
Day 27: Share a post about the benefits of hiring a professional photo booth company.
Day 28: Review and analyze the results of your social media efforts from the previous week…..Again!
Day 29: Share a post about any special deals or discounts you are currently offering.
Day 30: Review and revise your social media plan for the next month based on your results and any necessary adjustments.
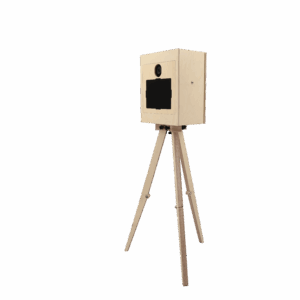
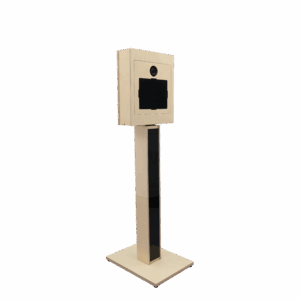


![]() Our product is made right here in Newark, Delaware U.S.A.
Our product is made right here in Newark, Delaware U.S.A.

")
")